Using Infura (or a custom provider)
Infura’s API suite provides instant HTTPS and WebSocket access to the Ethereum and IPFS networks. By using Infura, you can connect easily to Web 3.0 without having to spin-up and maintain your own infrastructure. Their core service is free and provides everything you need to start building awesome decentralized applications today!
You may not be familiar with Infura by name, but if you've used MetaMask then you've used Infura, as it is the Ethereum provider that powers MetaMask.
For security reasons, Infura does not manage your private keys, which means Infura cannot sign transactions on your behalf.
However, Truffle can sign transactions through the use of its HDWalletProvider. This provider can handle the transaction signing as well as the connection to the Ethereum network. (Read more about HDWalletProvider.)
This tutorial will show you how to use Infura to migrate an existing dapp to an Ethereum network supported by Infura. In this specific instance, we'll migrate to Sepolia. We'll assume that you already have a dapp to migrate. If you want a test dapp, feel free to use our Pet Shop tutorial dapp.
Install HDWalletProvider
Truffle's HDWalletProvider is a separate npm package:
npm install @truffle/hdwallet-provider
Note: If you are on Windows and get an `MSBUILD` error, you may need to install the Windows build tools. In a terminal with Administrator rights, run `npm install -g windows-build-tools` and then try installation again.
Register with Infura and create a new project
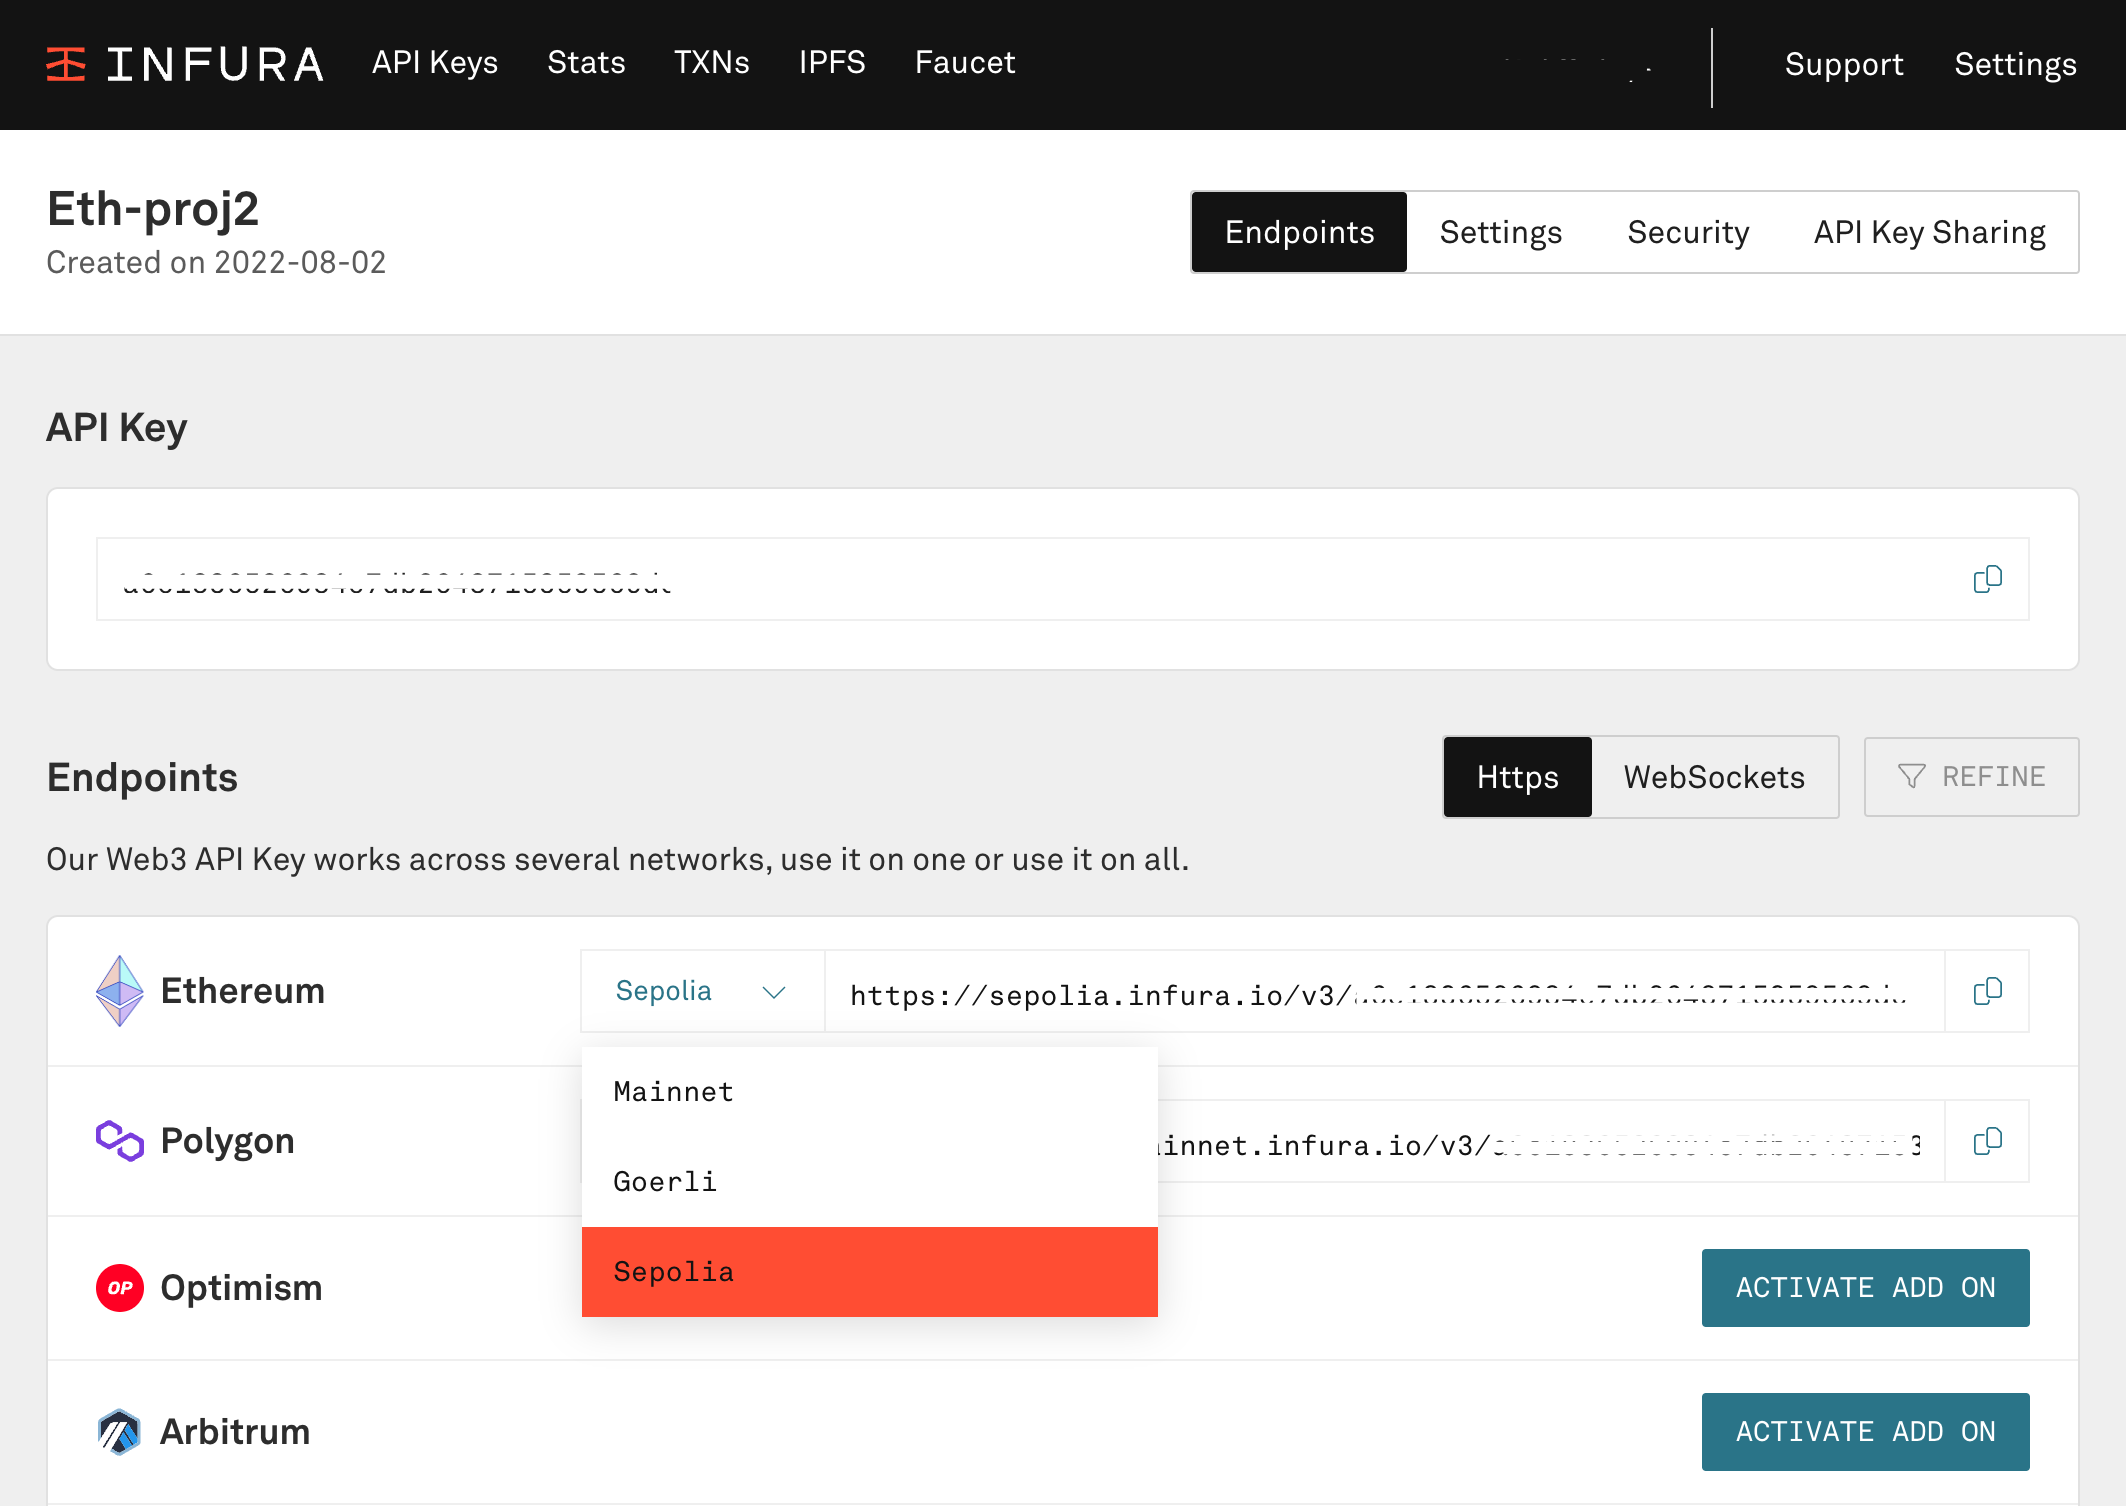
Before you can use Infura, you need to register. Upon registration, this guide will walk you through creating a new project, authenticating with your new Web3 API Key, securely copying your keys and selecting the appropriate network endpoint.
Configure your Truffle project
The next step is to edit your truffle-config.js file to use HDWalletProvider and provide all the necessary configuration for deploying to Sepolia.
- First, define the
HDWalletProviderobject in your configuration file. Add this line at the top of yourtruffle-config.jsfile:
const HDWalletProvider = require("@truffle/hdwallet-provider");
- Next, provide a reference to your mnemonic that generates your accounts. If you don't have a mnemonic, you can generate one using an online mnemonic generator or a hardware wallet such as a product from Ledger.
const mnemonic = "orange apple banana ... ";
Warning: In production, we highly recommend storing the mnemonic in another (secret) file, to reduce the risk of the mnemonic becoming known. If someone knows your mnemonic, they have all of your addresses and private keys!
- Add a Sepolia network definition:
module.exports = {
  networks: {
    sepolia: {
      provider: function() {
        return new HDWalletProvider(mnemonic, "https://sepolia.infura.io/v3/<INFURA_WEB3_API_KEY>")
      },
      network_id: 11155111
    }
  }
};
Things to notice:
-
While the example has only a single network defined, you can define multiple networks as normal.
-
The
providerfor thesepolianetwork definition instantiates theHDWalletProvider. -
The
HDWalletProvidertakes as arguments a mnemonic and the desired network. A list of Infura-supported networks is available in the Endpoints dropdown on your Infura Project Settings page.
-
Make sure to replace
<INFURA_WEB3_API_KEY>with your Infura Web3 API Key. -
The
providervalue is wrapped in a function, which ensures that it won't get initialized until it's needed. This is especially important if connecting to multiple networks. (See the Networks configuration section of the documentation for more on this topic.)Note: If you encounter issues with this construction, you can skip the function wrapper and use this instead:
provider: new HDWalletProvider(mnemonic, "https://sepolia.infura.io/v3/<INFURA_WEB3_API_KEY>"), -
Without any other arguments, the account in charge of migration will be the first one generated by the mnemonic. But if desired, you can pass in an argument to specify which account to use. As an example, to use the third account:
new HDWalletProvider(mnemonic, "https://sepolia.infura.io/v3/<INFURA_WEB3_API_KEY>", 2);(Recall that the index is zero-based, so
2is the third address.)
Use an ether faucet
Make sure you have enough ether in your account to do the deployment. You can acquire ether on the Sepolia network through a service known as a faucet. While there are multiple faucet sites out there, one service we recommend is hosted by Infura.
-
Navigate to Infura's Sepolia Testnet Ether Faucet.
-
Connect to the Sepolia Test Network using MetaMask.
-
The faucet will link to your first account. Click "RECEIVE ETH" to submit your request.
-
Within a short period of time, your account will be populated with the requested ether.
We are now ready to deploy to Sepolia!
Deploy the contract
- Compile your project, if not already done:
truffle compile
- Deploy to the Sepolia network:
truffle migrate --network sepolia
If all goes well, you should see a response that looks similar to the following:
Starting migrations...
======================
> Network name:    'sepolia'
> Network id:      11155111
> Block gas limit: 0x6691b7


1_initial_migration.js
======================

   Deploying 'Migrations'
   ----------------------
   > transaction hash:    0x166c1791caa73cca6a75fe4258866bd1f2d1bcf2cd4c3a2a1e03fab29c42829d
   > Blocks: 0            Seconds: 0
   > contract address:    0x5ccb4dc04600cffA8a67197d5b644ae71856aEE4
   ......
   ......
Note that your transaction hash and contract address will be different from the ones above.
Note: If you receive an error `Error: Exceeds block gas limit `, you may need to manually set the gas limit for your contract. See the [Truffle Configuration](/docs/truffle/reference/configuration) documentation for details.
If you want to verify that your contract was deployed successfully, you can check this on the Sepolia section of Etherscan. In the search field, type in the transaction ID for your contract.
You should see details about the transaction, including the block number where the transaction was secured.
Congratulations! You've deployed your contract to Sepolia using the combined power of Infura and Truffle.